7 Tips for Choosing the Best Micro Inverter

Time:2026-11-08 Author:Sienna
0%

Solar growth is changing how homeowners evaluate rooftop equipment. IRENA’s Renewable Capacity Statistics 2024 reports that global renewable capacity grew by 473 GW in 2023, with solar contributing 346 GW. That expansion makes component choices more consequential, but headline growth alone cannot identify the right inverter for a particular roof.

A Micro Inverter converts power at each panel rather than relying on one central string inverter. This can help systems with partial shade, different roof orientations, or panel-level monitoring needs. It is not automatically the better option. Roof layout, module compatibility, system size, installation quality, and replacement access all affect the decision. Small details matter.

This guide presents seven practical tips for comparing models: check electrical compatibility, continuous output, conversion efficiency, monitoring features, warranty terms, safety provisions, and manufacturer support. NREL’s photovoltaic research and technical guidance emphasize that system performance depends on more than individual component ratings; design and operating conditions matter too. Buyers should therefore compare specifications under relevant conditions, not just choose the highest efficiency figure. A bright showroom number can mislead.

The discussion also recognizes a real trade-off: panel-level electronics may offer useful visibility and flexibility, while adding equipment on the roof. No product is perfect, and warranty language can be harder to interpret than expected. The goal is a well-matched system, backed by verifiable specifications and dependable service—not the most impressive brochure.
7 Tips for Choosing the Best Micro Inverter

Understand How Micro Inverters Work

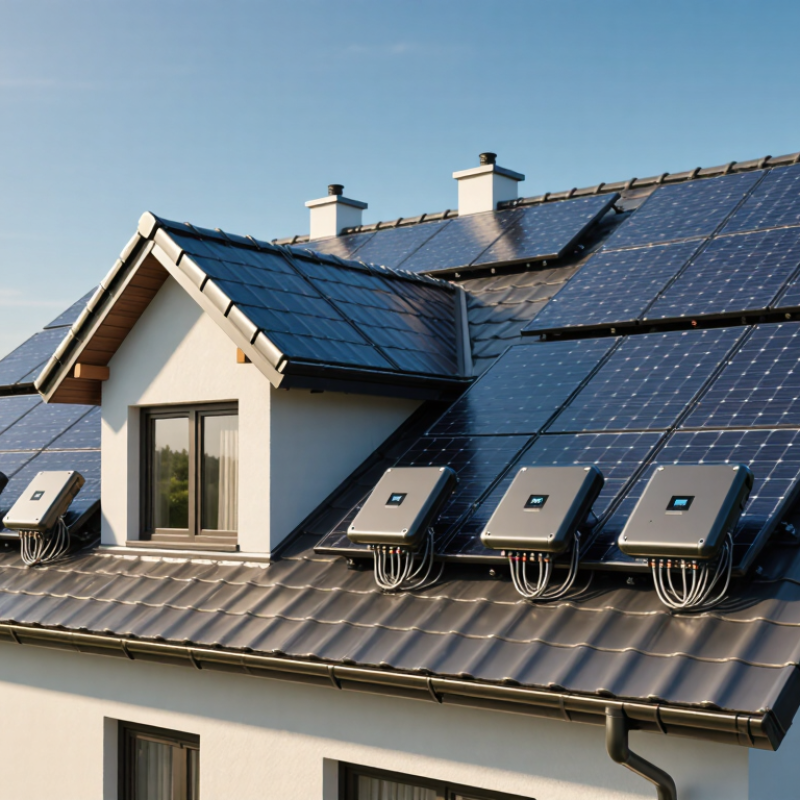
A microinverter converts the direct current from one solar panel into grid-compatible alternating current. It typically sits beneath the panel, so each unit can track that panel’s output independently. If one panel is shaded by a chimney, neighboring panels can keep producing normally. The shaded panel still loses energy, though. That distinction matters.

The U.S. National Renewable Energy Laboratory’s PVWatts documentation uses a default 14% system-loss assumption when estimating solar production. This is a modeling value, not a guaranteed loss for every roof, but it shows why inverter choice alone cannot predict a system’s yield. Dust, wiring, shading, and other conditions matter too.

Check that the monitoring system reports output at the panel level, then compare readings over several clear days. A single low reading may reflect shade or dirt, not a faulty inverter. I would also check the unit’s rated output and operating temperature range against the panel specifications. Small details matter.

Microinverters can simplify panel-level monitoring, but they add electronics beneath the array, where access may be less convenient. That trade-off is easy to overlook.

Check Compatibility With Your Solar Panels and System

A micro inverter must match the electrical limits of each solar panel, not just its advertised wattage. Compare the panel’s open-circuit voltage and operating voltage with the inverter’s permitted input range. Check current ratings too. A panel’s voltage can rise in cold weather, so use the figures specified for your local conditions rather than relying on a mild-day reading. Do not guess. A mismatch may cause poor performance or exceed equipment limits.

Look beyond the panel label. Confirm how many modules each inverter input supports, and whether the panel’s connector and cable arrangement are compatible. Then check the inverter’s AC output against your home system’s voltage and phase. If you are adding panels to an existing array, verify that the monitoring equipment and system design can accommodate the new units. Small details matter. A connector that appears to fit is not proof of electrical compatibility. Compare the current datasheets, and ask a qualified installer to review any unclear ratings before purchase. It is easy to focus on peak power and miss startup voltage or input-current limits; that is an understandable oversight, but worth correcting before installation.

Compare Power Ratings and Energy Conversion Efficiency

7 Tips for Choosing the Best Micro Inverter

Compare Power Ratings and Energy Conversion Efficiency

A micro inverter’s power rating should match the panel it serves, not just look large on a product sheet. Compare its maximum DC input with the panel’s wattage and voltage across expected temperatures. Then check rated AC output: it determines how much usable power reaches your home. Numbers can mislead. A panel may briefly produce more than the inverter can convert, causing clipping during strong midday sun. That can be acceptable if the yearly energy gain outweighs the brief peak loss.

Efficiency needs equal care. Look for weighted efficiency, such as CEC or European efficiency, because peak efficiency describes only favorable operating conditions. Compare figures measured under similar standards; otherwise, a one-point difference may not mean much. For a practical estimate, multiply expected DC production by the inverter’s efficiency, then account for shading, heat, and panel orientation. A cool, south-facing roof behaves differently from a hot, partly shaded one.

Also review startup voltage and the operating range. Panels often spend mornings and evenings below their midday output, so performance across ordinary conditions matters. A slightly lower peak rating can still work well if the inverter remains efficient throughout the panel’s daily range. Datasheets cannot capture every roof condition; a careful comparison may still miss local wiring or temperature effects.

Evaluate Safety Features, Durability, and Installation Needs

Safety deserves more than a checkbox. Check that the microinverter carries recognized electrical-safety certification and supports the shutdown functions required by your local rules. NREL’s 2018 photovoltaic operations and maintenance guide notes that inverters commonly have shorter service lives than PV modules, so ask about replacement access and warranty coverage. A rooftop unit should be reachable without removing several panels. Small details matter.

Tip: Compare enclosure ratings, operating-temperature limits, and warranty terms. Dust, salty air, and trapped heat can challenge equipment over time. Jordan and Kurtz’s 2013 review in Progress in Photovoltaics analyzed nearly 2,000 PV degradation estimates and reported a median module degradation rate of about 0.5% per year. That figure describes modules, not microinverters, but it highlights why component durability should be assessed separately.

Installation needs vary with roof layout. Check connector compatibility, cable routing, and whether each unit can be mounted beneath the intended panel. Ask the installer to explain how they will inspect connections later. It may sound fussy. Yet a neat cable run is easier to troubleshoot than one tucked behind a crowded array. A datasheet cannot predict every roof condition; shade, ventilation, and access still deserve a site-specific review.

7 Tips for Choosing the Best Micro Inverter: Evaluate Safety, Durability, and Installation Needs

Safety check: verify that the system’s rapid-shutdown design meets the applicable electrical code.

Under the 2020 NEC rapid-shutdown requirements, controlled conductors must be reduced to 30 V or less outside the PV array boundary and 80 V or less inside it, within 30 seconds of shutdown initiation. When comparing microinverters, also check safety certifications, enclosure ratings, warranty terms, module compatibility, monitoring, and installation access. Requirements depend on the code adopted locally.

Source: NFPA 70 (2020), Section 690.12. Values shown are voltage limits, not typical operating voltages.

Review Monitoring, Warranty, and Total Cost of Ownership

A microinverter’s monitoring system should make everyday checks simple. Look for clear, module-level production data, not just a single household total. If one panel underperforms on a cloudy afternoon, detailed readings can help distinguish a temporary weather effect from a persistent issue. Check how often data updates and whether the system flags communication failures. A dashboard that stops reporting can make healthy equipment look faulty. Small details matter.

Read the warranty terms, not only the number of years printed in large type. Check what is covered, how replacement parts are handled, and whether labor or shipping may cost extra. Then estimate total ownership cost: purchase price, installation, monitoring fees, and possible service visits. A lower upfront price may not stay lower if support is difficult to access. Ask how a failed unit can be reached beneath the panels; roof layout can affect repair time. I would not treat any estimate as exact, since labor and access vary. Compare realistic scenarios, and leave room for uncertainty.

7 Tips for Choosing the Best Micro Inverter - Review Monitoring, Warranty, and Total Cost of Ownership
Tip What to Compare Practical Check Why It Matters
1. Confirm panel compatibility Maximum DC input voltage, MPPT operating range, and allowable input current Check the panel’s voltage and current figures against the inverter datasheet. Account for the panel’s higher open-circuit voltage in cold conditions and follow the stated input limits. Electrical mismatches can reduce production or create an unsafe design. Compatibility should be confirmed for the exact panel and local temperature conditions.
2. Match AC output to the system design Continuous AC output power, grid voltage, and the system’s DC-to-AC sizing Compare the inverter’s rated output with the proposed panel capacity and utility requirements. Use an energy-yield estimate for the site rather than relying on a single sizing rule. Appropriate sizing balances energy production, inverter clipping, system cost, and grid connection limits.
3. Compare efficiency using the same metric Weighted efficiency, such as CEC efficiency where applicable, rather than maximum efficiency alone Compare figures measured under the same test standard. Review the datasheet’s operating range as well as its headline efficiency figure. Standardized figures make comparisons more meaningful. Real-world energy also depends on temperature, shading, orientation, and system design.
4. Review monitoring features and access Panel-level production data, alert functions, data refresh interval, export options, and ongoing fees Check whether the monitoring platform shows each panel separately, how often readings update, whether alerts are included, and whether historical data can be downloaded. Panel-level information can help identify an underperforming module. Subscription fees or limited data access can affect convenience and long-term costs.
5. Read the warranty terms—not just the duration Warranty length, covered components, exclusions, claim process, and labor or shipping coverage Compare the written warranty for each shortlisted model. Confirm who handles a claim and whether removal, replacement, and return shipping are covered. A long product warranty does not necessarily cover the labor and service costs of replacing equipment on a roof.
6. Calculate total cost of ownership Installed price, monitoring fees, expected service costs, warranty coverage, and possible replacement labor Use a consistent project size and time period. For example, an added cost of $0.10 per watt on an 8,000-watt system equals $800 upfront, before any service or monitoring costs. The lowest purchase price may not be the lowest lifetime cost. Compare the same assumptions for every option and treat future costs as estimates.
7. Check site conditions, safety, and service support Operating temperature range, enclosure rating, applicable certifications, installation requirements, and local support Verify that the equipment is suitable for the site’s heat, moisture, and exposure conditions. Confirm certifications and electrical-code requirements with the installer and local authority. Environmental suitability and compliant installation affect safe operation, reliability, and the availability of service when needed.

Specifications and warranty terms vary by model, region, and installation. Verify current datasheets, written warranty documents, utility requirements, and installer quotes before making a purchase.

FAQS

What does a microinverter do?

It converts one solar panel’s direct current into grid-compatible alternating current. Each unit handles its panel independently.

Does panel-level operation prevent shading losses?

No. If a chimney shades one panel, nearby panels can keep producing. The shaded panel still loses energy.

How can I check panel performance?

Use monitoring that shows output for each panel. Compare readings over several clear days. One low reading may mean dirt or shade, not failure.

How should the power rating match my panel?

Compare the inverter’s maximum DC input with the panel’s wattage and voltage. Check rated AC output too; it limits usable power.

Is a little power clipping always a problem?

Not necessarily. Strong midday sun may briefly exceed the inverter’s capacity. That trade-off can be acceptable, but it deserves a yearly energy estimate.

Which efficiency figures should I compare?

Compare weighted efficiency figures measured under similar standards. Peak efficiency reflects favorable conditions, not every cloudy morning or hot afternoon.

What safety and durability details matter?

Check recognized electrical-safety certification, required shutdown functions, enclosure ratings, temperature limits, and warranty coverage. Small details matter.

What should I ask about installation and future repairs?

Confirm connector fit, cable routing, and access beneath each panel. A tidy cable run is easier to inspect. Roof conditions still complicate things.

Conclusion

Choosing the best Micro Inverter starts with understanding how it converts the direct current produced by an individual solar panel into usable alternating current. Since each unit works with a separate panel, it can help a system respond more flexibly to differences in sunlight or panel performance. Before choosing one, check that its electrical specifications and connection requirements are compatible with your panels and the rest of your solar system.

Compare power ratings and conversion efficiency to find an option suited to your expected energy production. Also consider safety protections, durability in local weather conditions, and how straightforward the installation will be. Monitoring tools can make it easier to track system performance, while warranty coverage offers reassurance over time. Finally, assess the total cost of ownership—not just the purchase price, but also installation, maintenance, and expected service life—to make a balanced decision.

Sienna

Sienna

Sienna is a skilled marketing professional with a deep expertise in our company’s core products and services. With a passion for innovation and detail, she plays a pivotal role in crafting insightful blog posts that not only highlight the unique features of our offerings but also provide valuable......